
Custom Fields & Configuration
Custom Fields provide unlimited flexibility to record and report out the data unique to your pantry.
This article is broken up into several sections. Use the links below to go to the section you are interested in.
- Areas Custom Fields are Used
- Create a New Custom Field (CF)
- CF Field Settings - Field Label
- CF Field Settings - Field Type
- CF Field Settings - Other Field (AKA Others in the household)
- CF Field Settings - Options
- CF Field Settings - Options Key Value Methods
- CF Field Settings - Role
- CF Field Settings - Status
- Editing a Custom Field
- Deleting a Custom Field
- Extra CF Field Type - Signatures
- Associating the Visit Custom Fields Correctly
Areas Custom Fields are Used
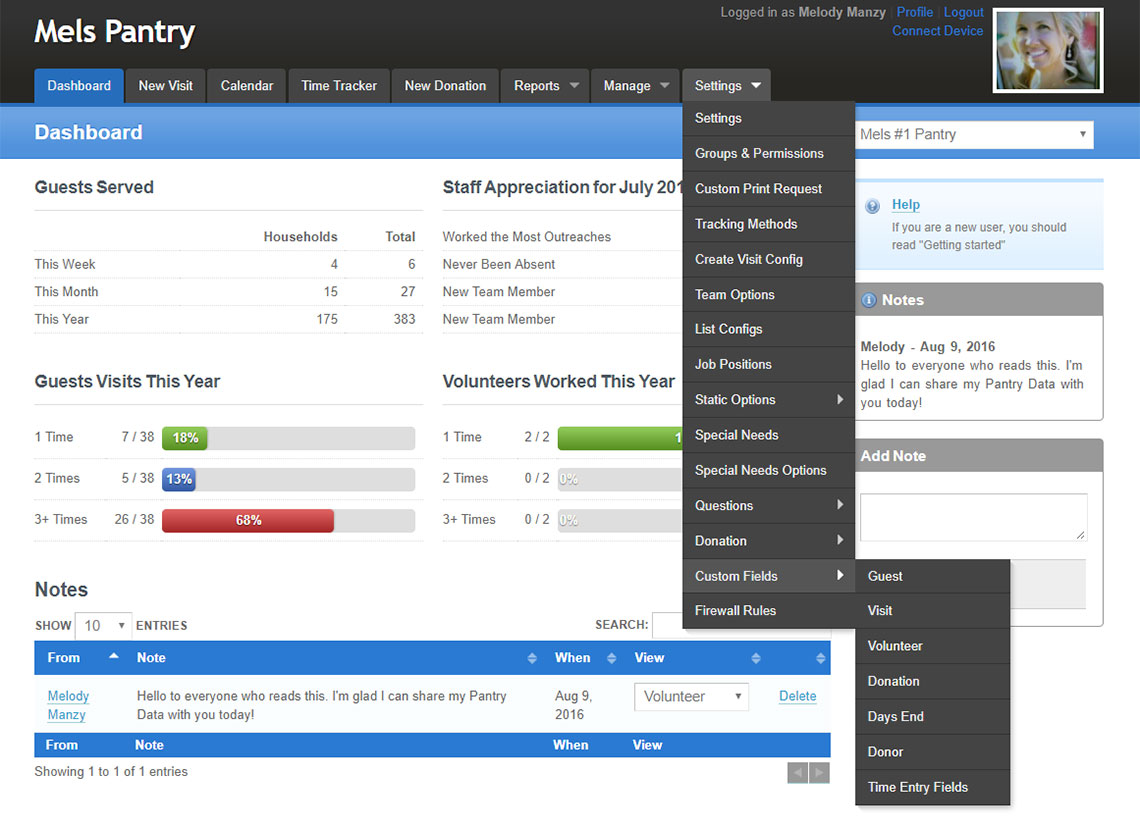
To create a custom field, go to Settings > Custom Fields. Choose the area you want to create the custom field for from the list of options.
Below is a list and description of the available areas for custom fields.
- Guest – Thia area allows you to collect additional data that will be a part of each guest record. Consider this as permanent or semi permanent guest data. This data is recorded for each visit.
- Visit – Consider this area's fields as survey questions which need to be answered each visit and are recorded for that visit.
- Volunteer – Create custom fields that will include information about a volunteer or team member as part of their record.
- Donation – Add custom donation fields when you need to collect information that does not already have a field for that data.
- Days End – Add fields that will be used in the Days End Report.
- Donor – Create custom fields that will include information about a donor as part of their record.
- Time Entry Fields – Create custom fields to be answered for team members when recording service time.
Note: The Donation Tool, Days End Report, Donor Records and the Time Tracker are built using custom fields. These are editable to fit your needs.
Create a New Custom Field (CF)
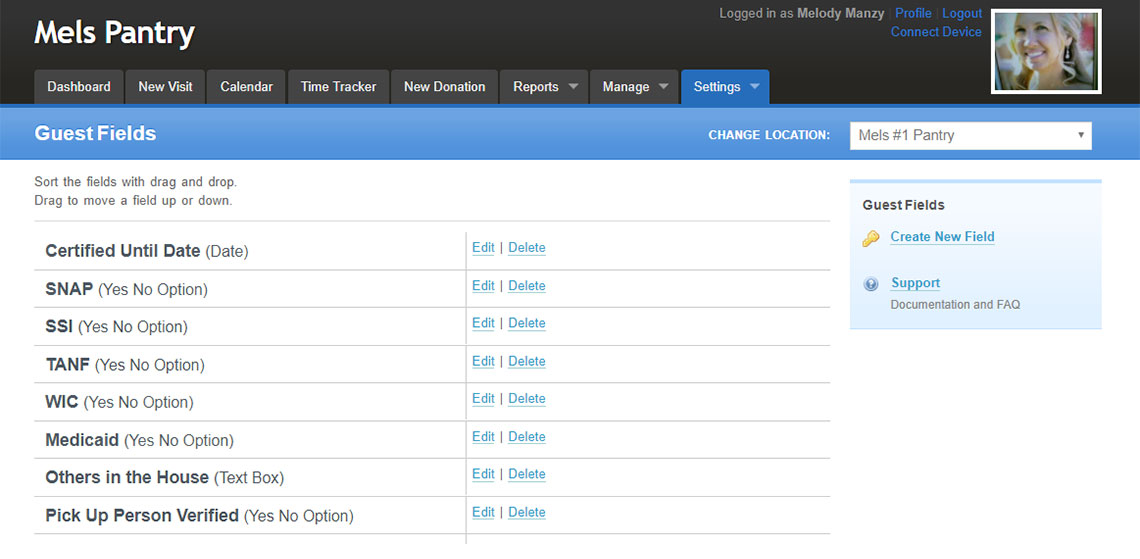
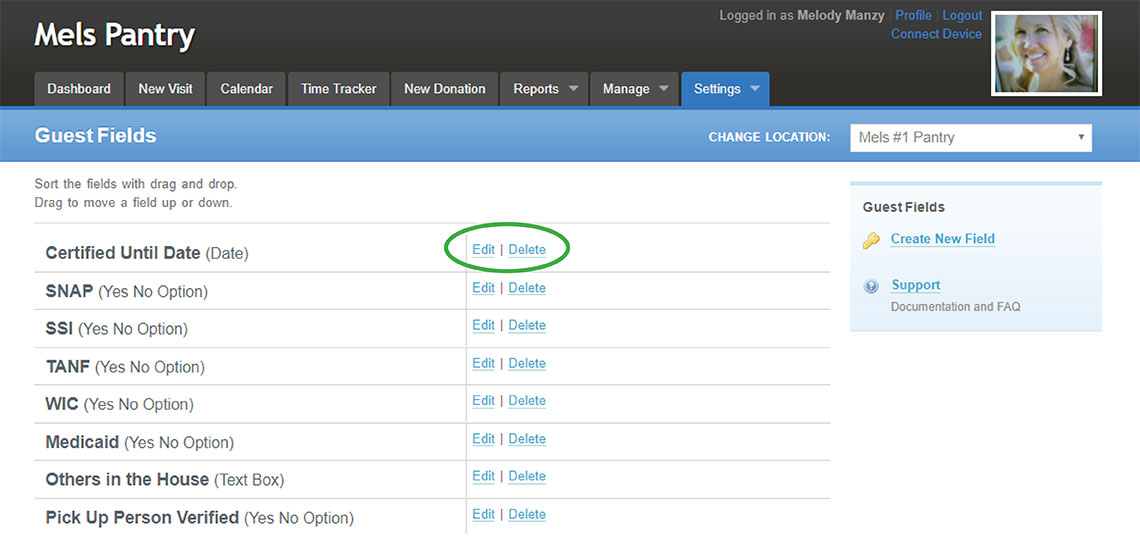
Once you have chosen an area from the list, you will choose to edit or delete an existing field or create a new one.
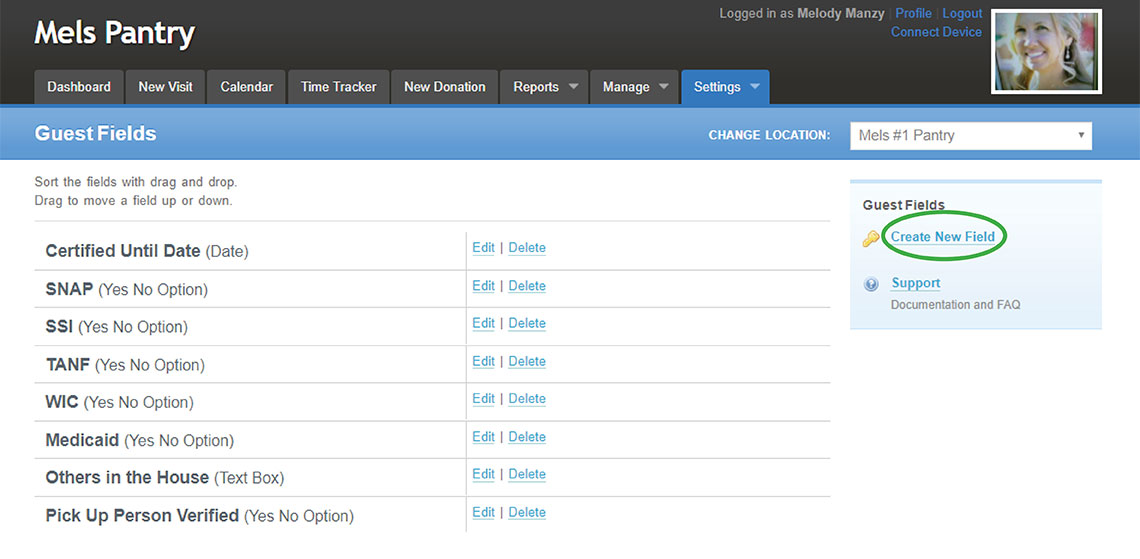
To create a new custom field, click on ‘Create New Field’ next to the gold key.
Working from top to bottom, fill in the information and click ‘Submit’ to save.
CF Field Settings - Field Label
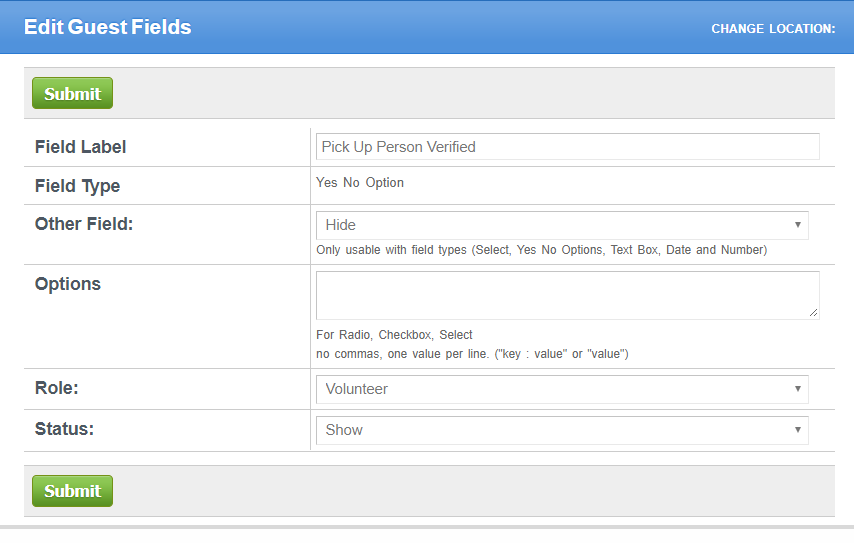
Field Label – This is the name of the field. When naming, choose a name that tells your volunteers how to use this field so they understand what data they are trying to collect.
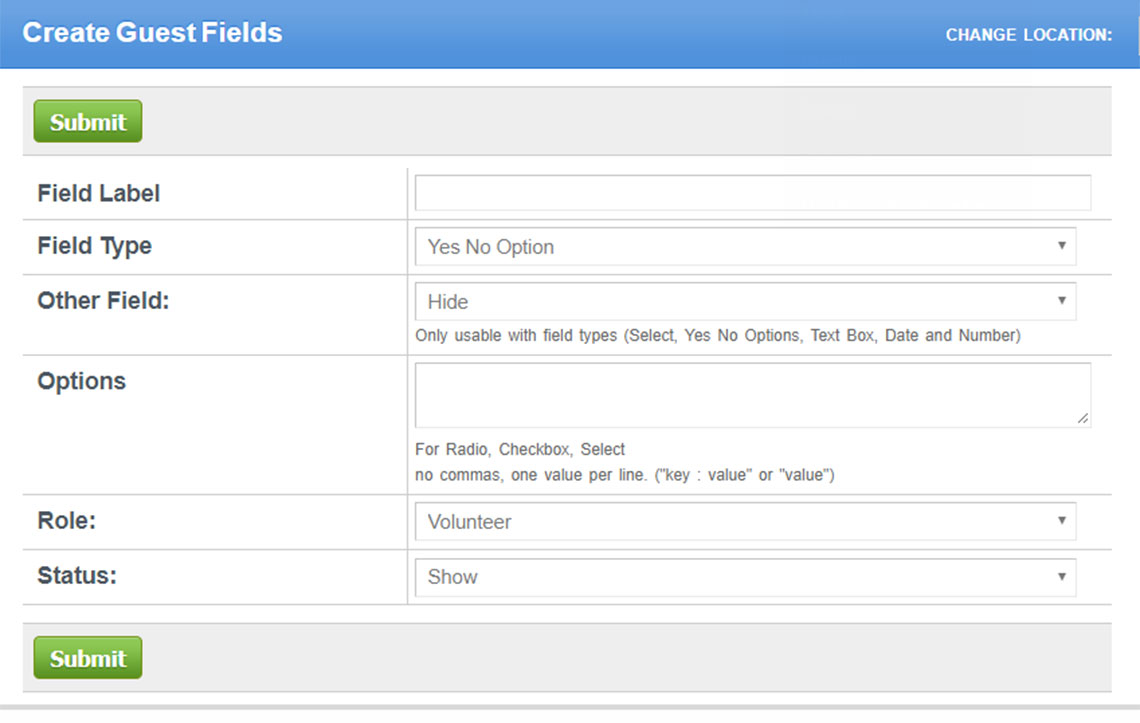
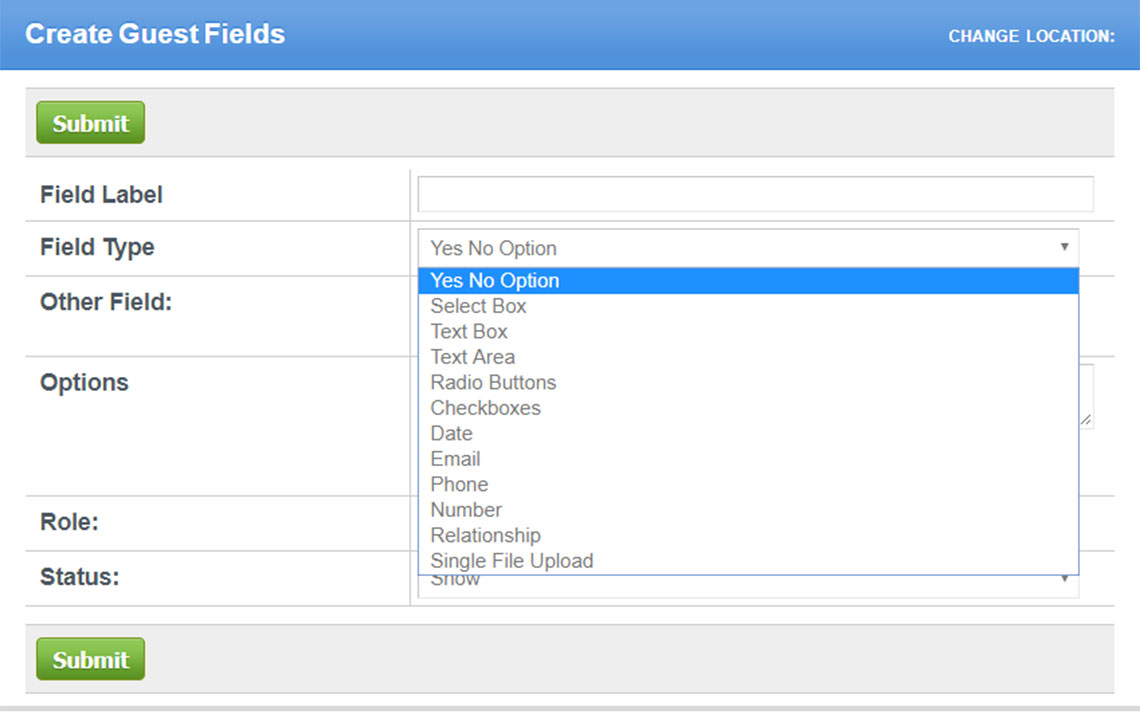
CF Field Settings - Field Type
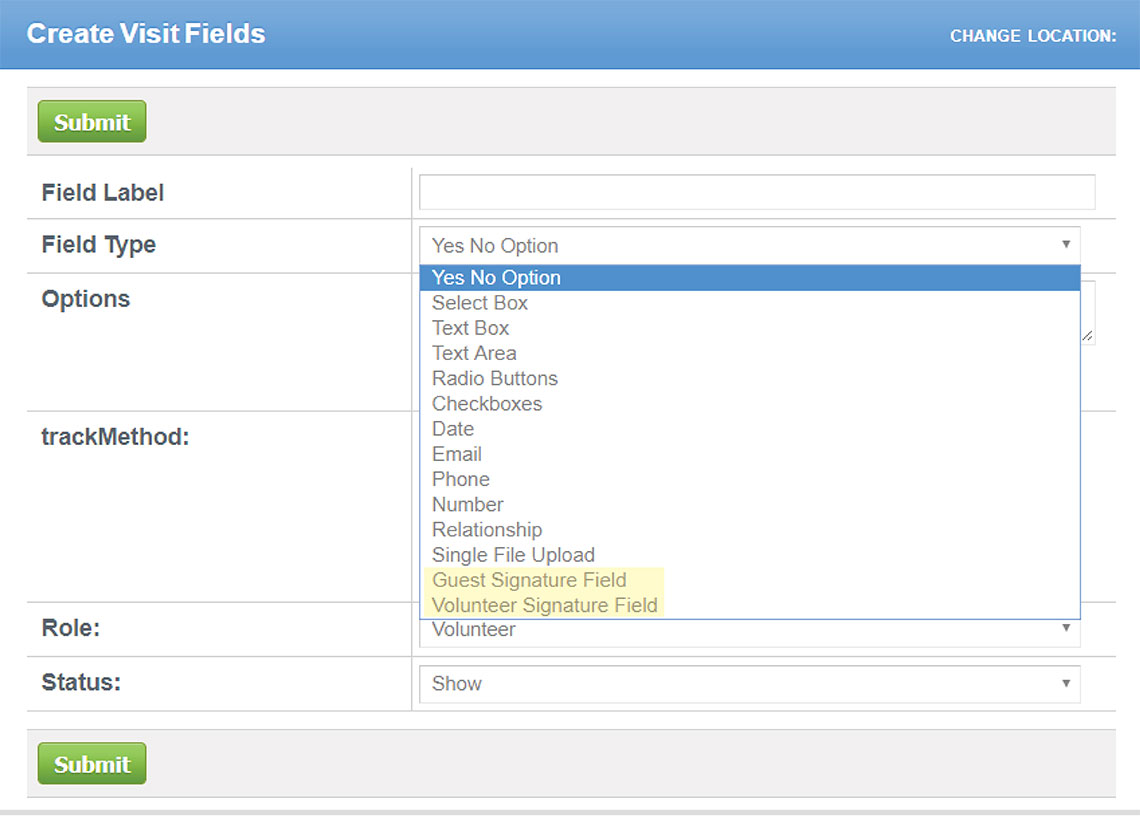
Field Type – Click the drop-down menu to display the ‘Field Type’ choices. Choose the field type that will best fit the data you wish to collect. Example: I want to identify if a client receives SNAP. I would choose the Yes No Option field type. Once you save the field and attempt to edit it later, the field type cannot be changed. If you chose the wrong field type you will need to remake a new field. Delete the wrong field you made earlier if not used, or hide it if it has already been used to collect data.
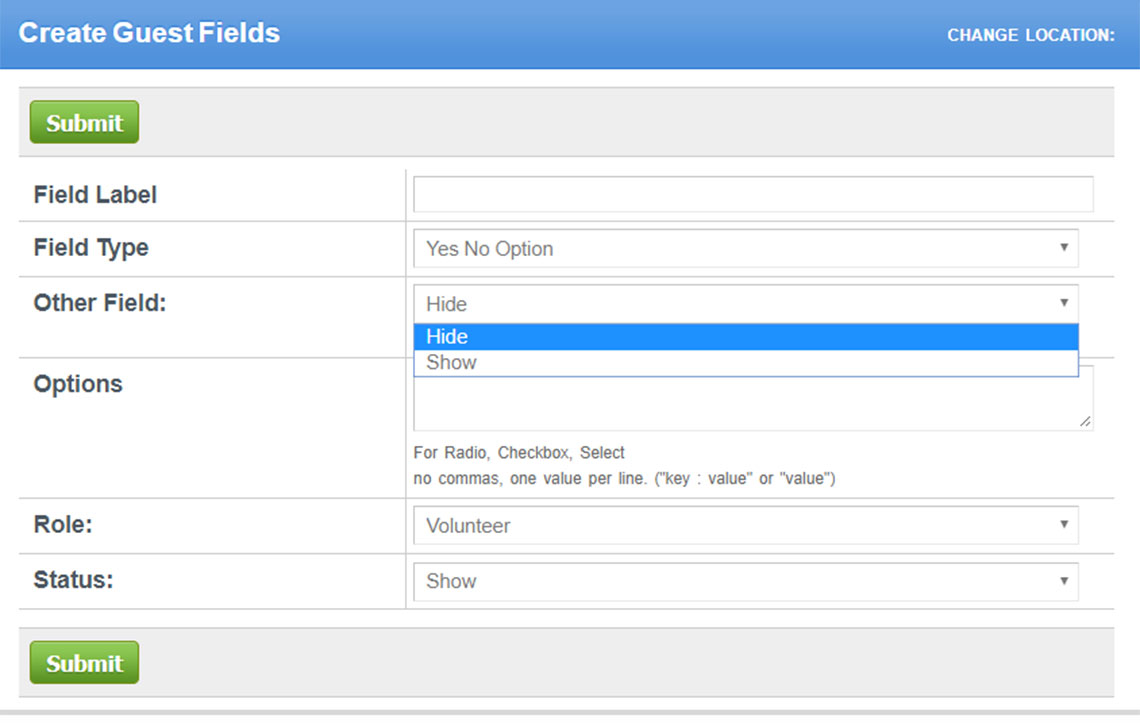
CF Field Settings - Other Field (AKA Others in the household)
Other Field – This field gives you the option of collecting information for others in the household.
- Set to ‘Show’ to collect data for each person in the household which includes the primary record holder.
- Set to 'Hide' to collect data for the primary record holder only.
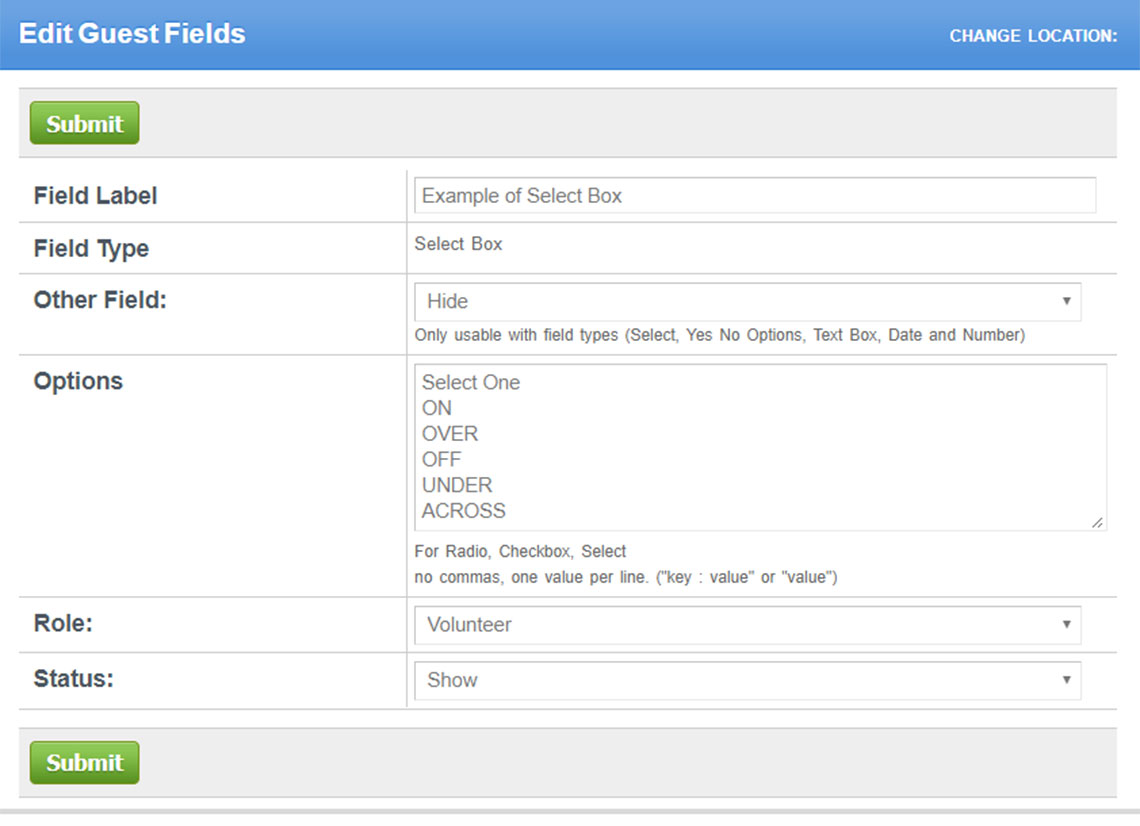
CF Field Settings - Options
Options – This field is used in conjunction with the ‘Field Types’: Radio Button, Checkboxes and Select Box. Use it to insert the answer list that you will be choosing when using this field. Enter only one answer per line and do not separate with commas. Once you type in an answer, hit enter and continue with the next answer. Do not hit enter after typing in your last answer as this will create an empty option that will cause confusion for the end users.
Tip: Left Click > Hold > Drag the lower right-hand corner of the options field down to expand. This makes it easier to see all of your options at the same time.
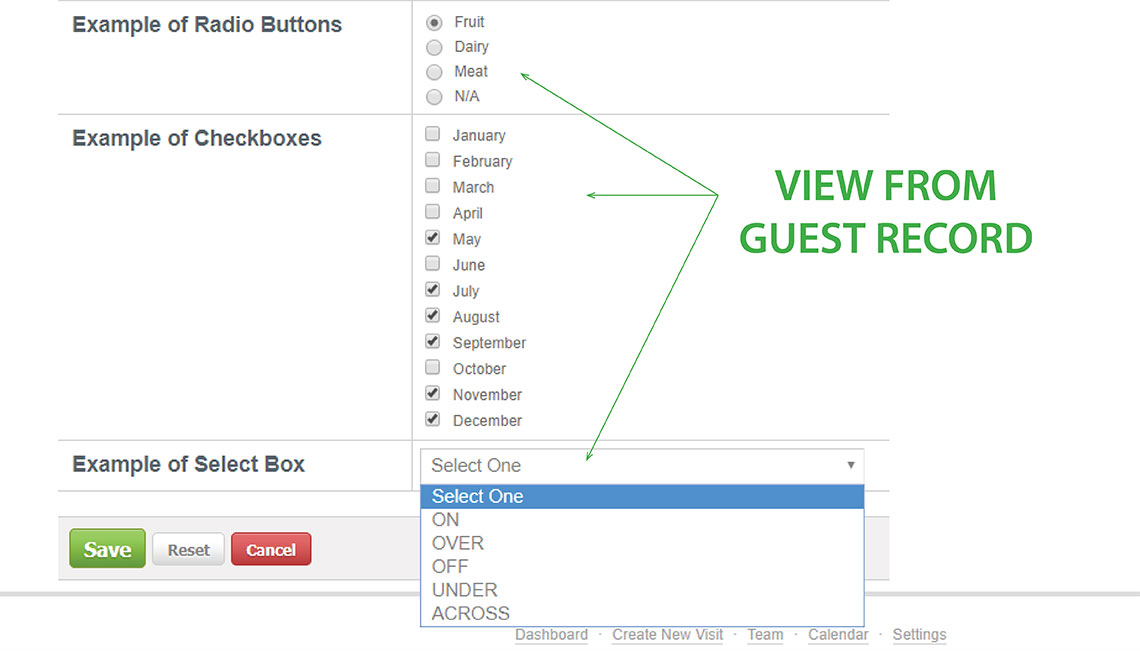
Only three field types use options. Below are the three and the differences in how they are displayed when interacted with by the end user.
- Radio Button allows you to see the full list of answers. Only one answer can be checked at a time. We suggest making ‘N/A’ one of your answers when setting up the field as this field may not apply to every guest. A downside of using this field type frequently is that it will create a rather lengthy form.
- Checkboxes allows you to see the full list of answers and allows you to check more than one answer. To uncheck an incorrectly selected answer, re-click that answer to deselect it. Use of this field type can cause complexity in reporting. We recommend if you use this field type that you test the reporting for desired results.
- Select Box helps save space by using a drop-down feature. Only one answer can be selected. The first item in the field options section will be the default answer, so we suggest typing in ‘Select One’ or something to that effect when setting up this field.
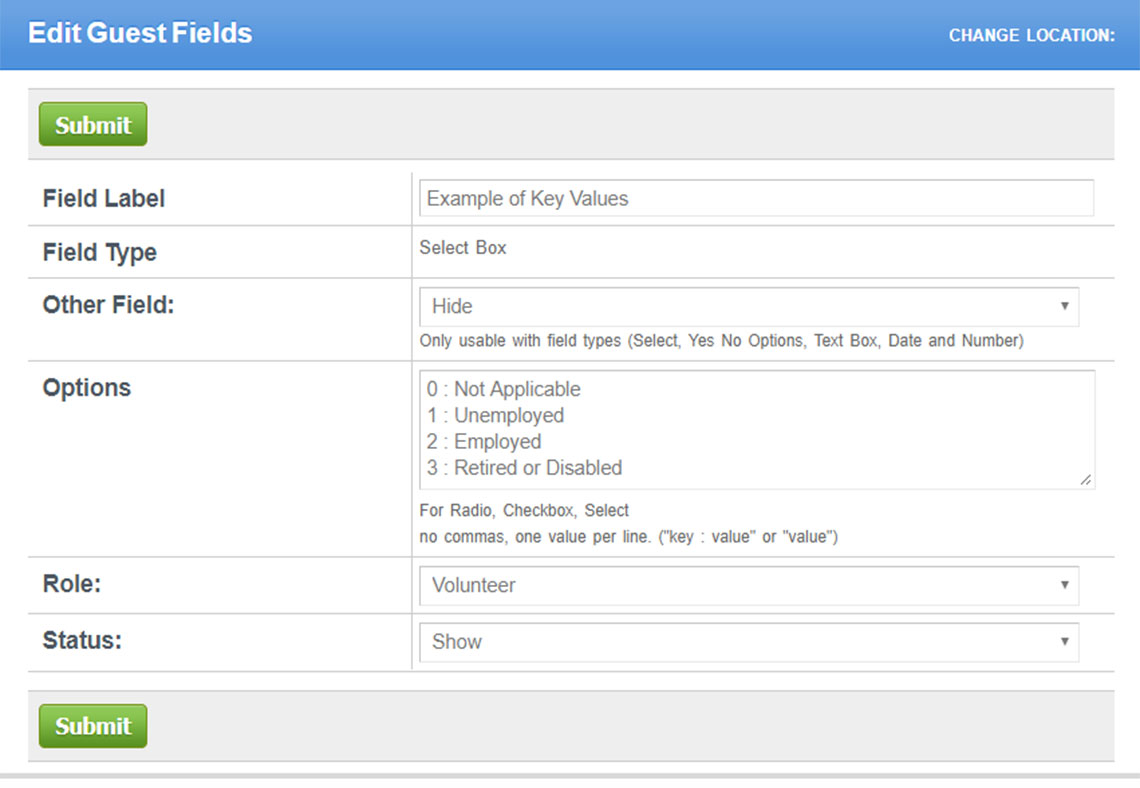
CF Field Settings - Options Key Value Methods
In the options field, you have two methods to enter in your data/answers that the end user will interact with when working with guests. A "Value" or a "Key : Value", both are acceptable but there are differences. Below we explain the differences and their use.
- "Value": Entering in your answers as a value only displays this answer when used, records this answer into the database as the key and value and reports out the value. The value in the option box is also the key for this answer because you did not specify a key. If in the future this field is edited and an answer is changed, you are also changing the key so you would lose all data collected on the original version of this answer.
- "Key : Value": Using this method for your answers displays the answer when used, records the key into the database with the value specified and reports out the value. If in the future, you edit this field and change a value for a key you would not lose the previous data because the key is the same as before. The format when entering an answer using the key value method is "Key : Value". You must include spaces before and after the colon and do not use quotes. There are more complex reasons for using the key value method, however the primary reason to use it, is it allows you to edit the value, due to a misspelled word or a refactoring of the answer without losing any data collected previously if you do not change the key.

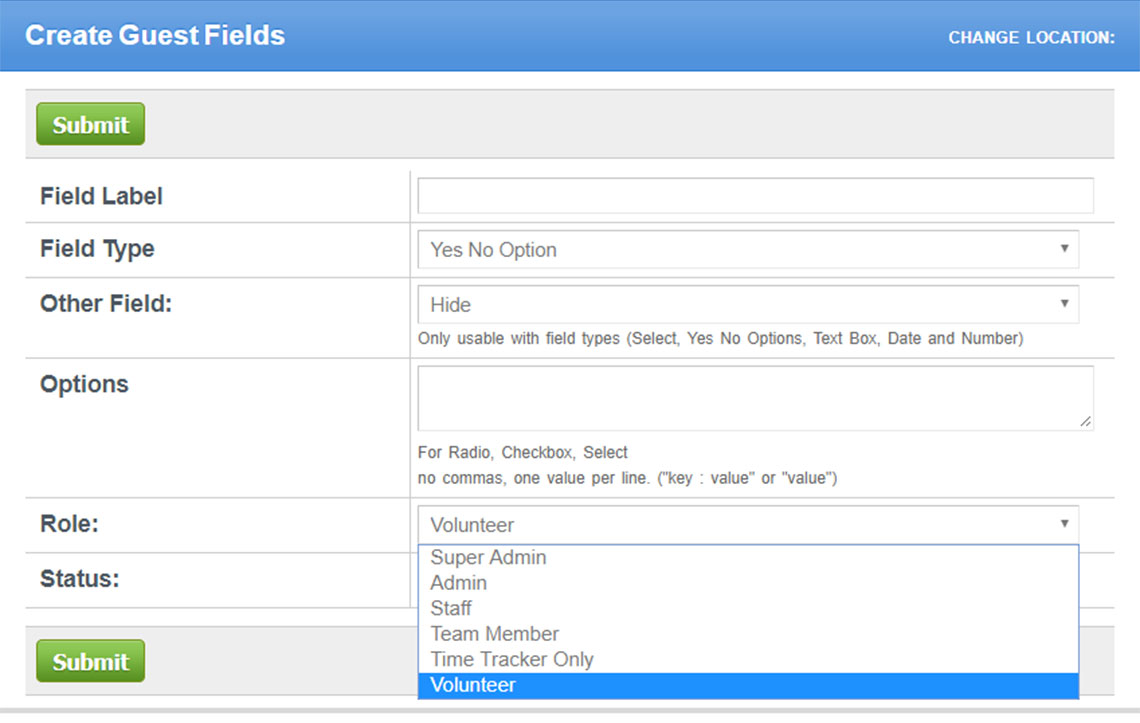
CF Field Settings - Role
Role – Determines who may see the field. The role you highlight and every role above it will see the field. Every role below your highlighted choice will be unable to see the field. This is a great option for extremely confidential matters.
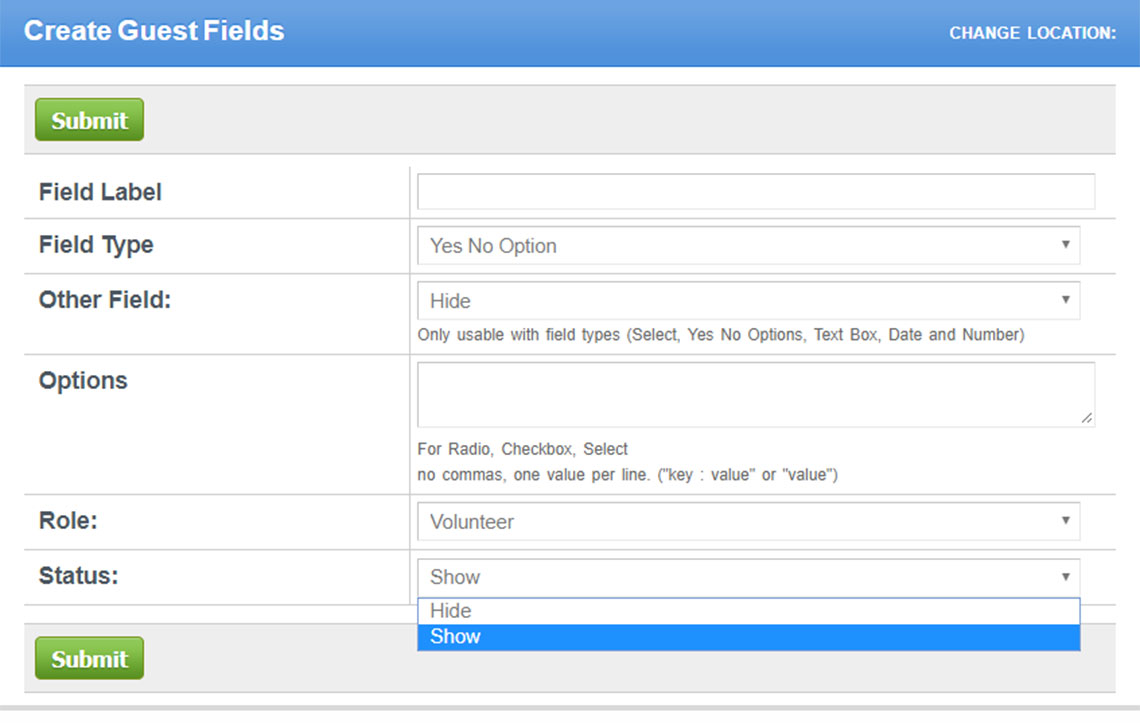
CF Field Settings - Status
Status – Set to ‘Show’ when the field is being used. Set to ‘Hide’ when it is not being used.
Note: As needs change and fields are no longer needed, we suggest hiding the field instead of deleting it. If hidden you can turn the field on and retrieve the data if needed. Remember deleting a custom field deletes all data collected by that field.
Editing a Custom Field
To edit an existing field, click ‘Edit’. Everything but the ‘Field Type’ can be edited. If you need a different ‘Field Type’, you will need to create a new field.
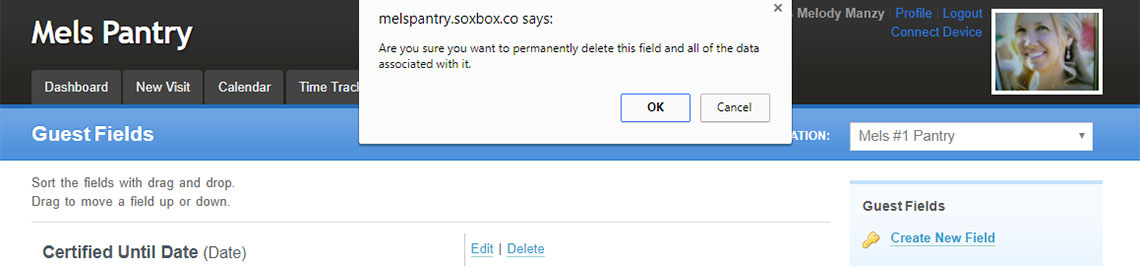
Deleting a Custom Field
To delete an existing field, click on ‘Delete’. A message box will pop-up asking you ‘Are you sure you want to delete this field and all of the data associated with it’. Click ‘OK’.
Extra CF Field Type - Signatures
Visit, Donation, Days End, Donor and Time Entry Fields also offer signature fields for ‘Field Type’.
Associating the Visit Custom Fields Correctly
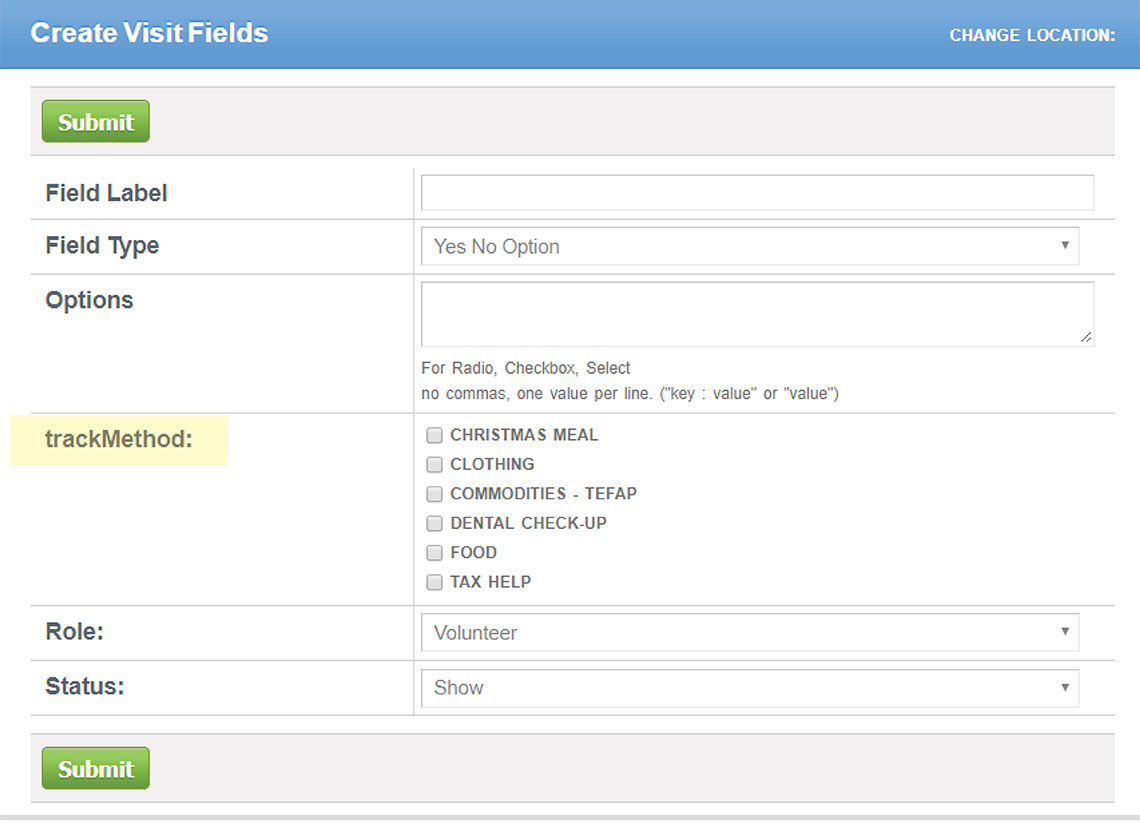
When creating new custom Visit and Days End fields there will be a ‘trackMethod’ section. Check all the tracking methods you want associated to this field.
When creating new custom Donation fields there will be a ‘Donation Methods’ section. Check all the donation methods you want associated to this field.

back to top