
Unlimited Case Notes & File Uploads
This feature is one of the least used features in FoodBank Manager but if you are an organization that does financial assistance, counseling, or just needs to save signed agreements or documents this feature is for you.
We provide two ways to keep information about your clients, Notes and Files. Notes are for simple communication and Files are used to upload scanned documents, word docs, spreadsheets, Pdf's, images and more. It is not designed to be a file storage per say but will handle all you need for the clients this information is uploaded for.
Notes
Notes are very functional and give you lots of control over who can view them. So if you have a note that you want to add to a clients but only want a particular group to have access to viewing it you can set it for that group and above.
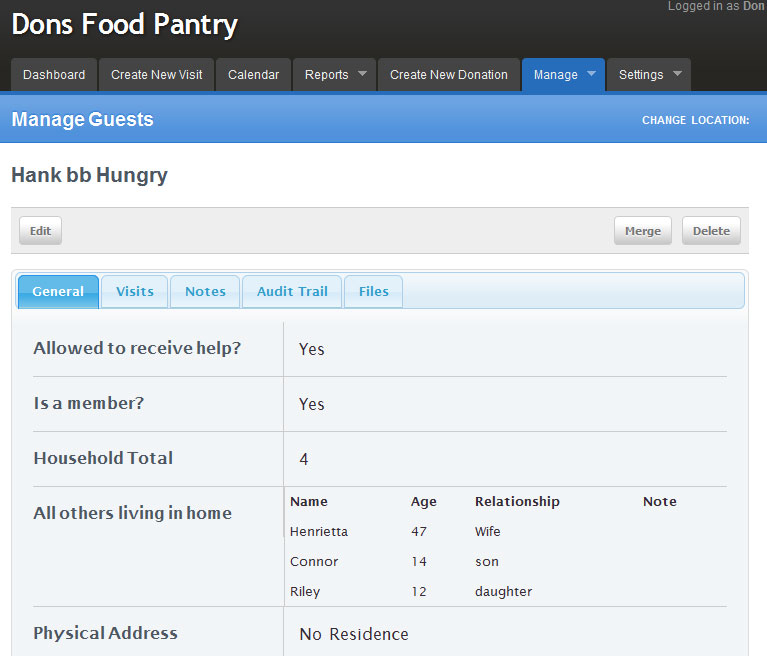
To work with notes on the Guest account you need to locate the guest first and the best way is to use Manage Guest to find your client. Once you locate them and select them you will be directed to their account page. The default landing page is the General page which is a summary page for that guest. There are many options and things to do on this page but we will concentrate on Notes and Files.
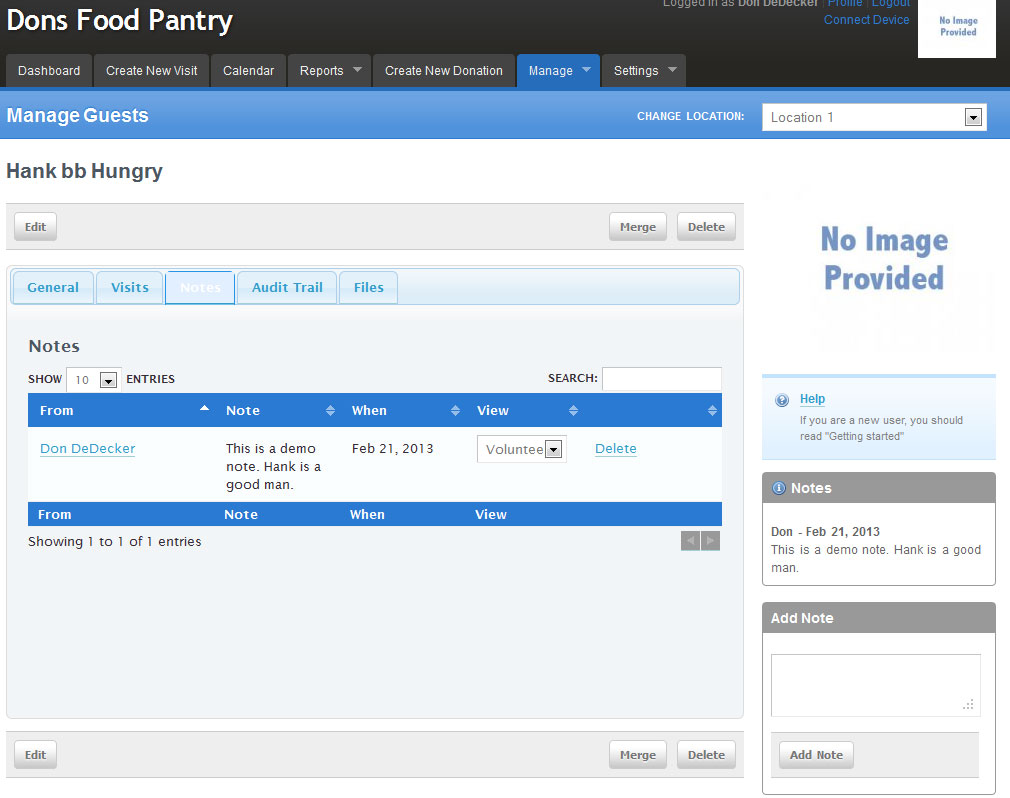
Click on the notes tab. Currently there are no notes entered but we will be adding one right now. To add the note click in the "Add Note" box at the bottom right of the screen. Type in your note and push the "Add Note" button below the text box. This will post the note into the system.
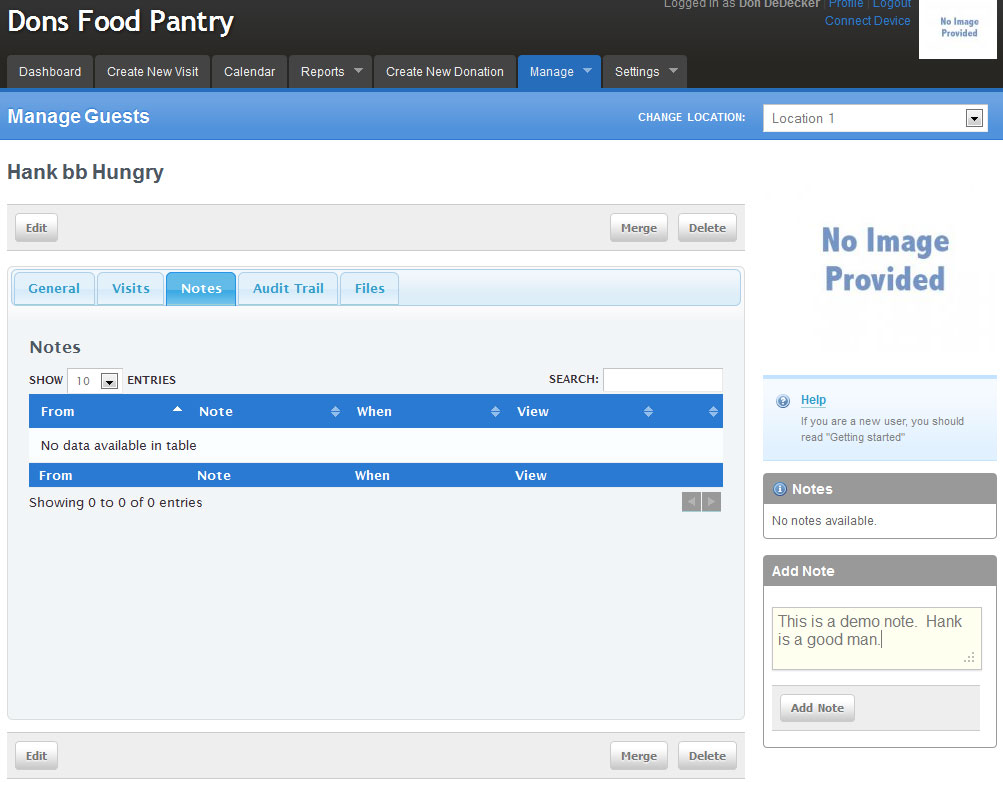
Now that the note is in the system you will see it displayed here. It will also show up in this guests summary page in the create visit process unless you change its security level. As an administrator there are a few things you can learn from this page and a couple of things you can do. The first column is "From" this identifies who made the note. The second column is the note itself. The third column is the date the note was created. The fourth column is "View" this is where you can set the permission level which determines who sees it and who does not see it. Then the last column is where you can delete the note if desired.
The note is also displayed in the notes box to the right and just above the spot where you originally entered the note.
back to top
Files
Files is where you upload documents, Pdf's, images, spreadsheets etc... This is so you can keep a record of documentation needed for services such as financial assistance, assistance agreements, counseling, signatures and more. To add a file to an account click on the browse button.
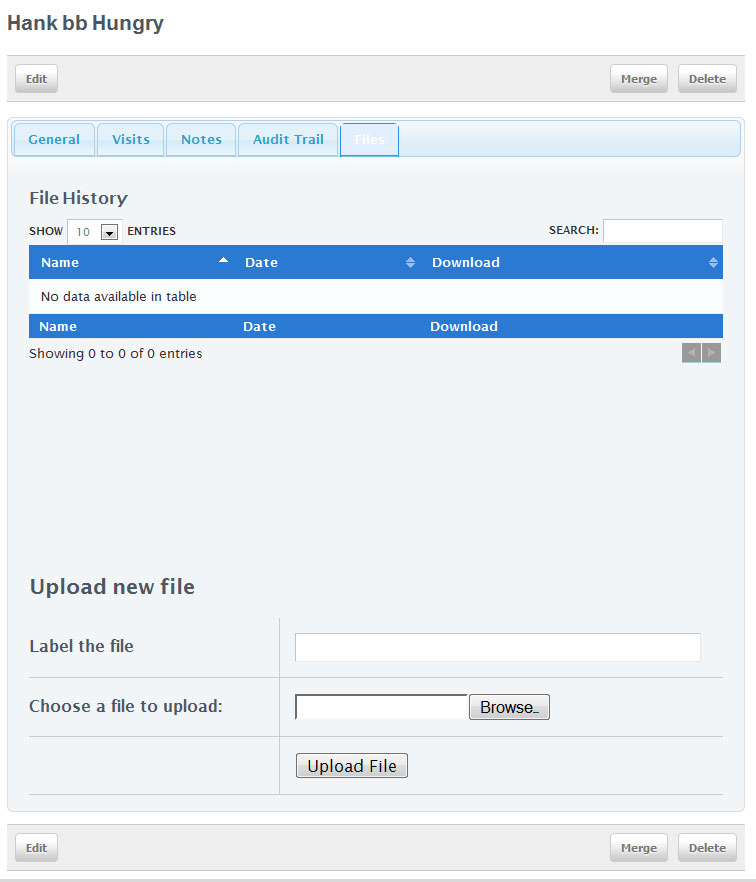
Browse to the file you want to add to the system and click on the "Open" button.

This sets the file in a ready to upload state. To finish the upload process you must name the file in the "Label the File" box above the upload window. After all the steps are completed click on the "Upload File" button and the upload will finish.

This is what an uploaded file looks like in FoodBank Manager. You have two options here, one is to view the file whenever needed and the other is to delete it. If you click on view it will open the document in a separate window so you can close that window and not close your FoodBank Manager window. For added security, if a team member has access to view files and has the thought of copying the link and sending it to someone else to try to steal information the link is only active for five minutes. Once the five minutes expires the file is not accessible to view using that link.
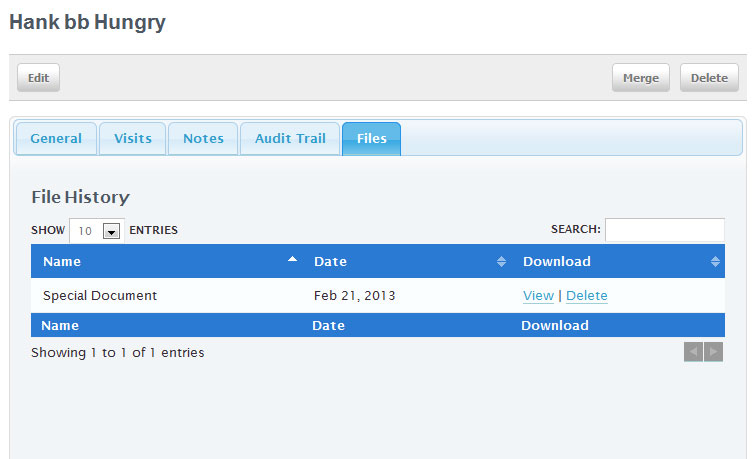
Lets click on the "View" link to see what happens. In this case I uploaded a Pdf so I click view and this pops up in a new window. Obviously I grabbed the wrong Pdf and will delete this one and upload the correct file. So I close the document view window and click on the "Delete" link for that document.
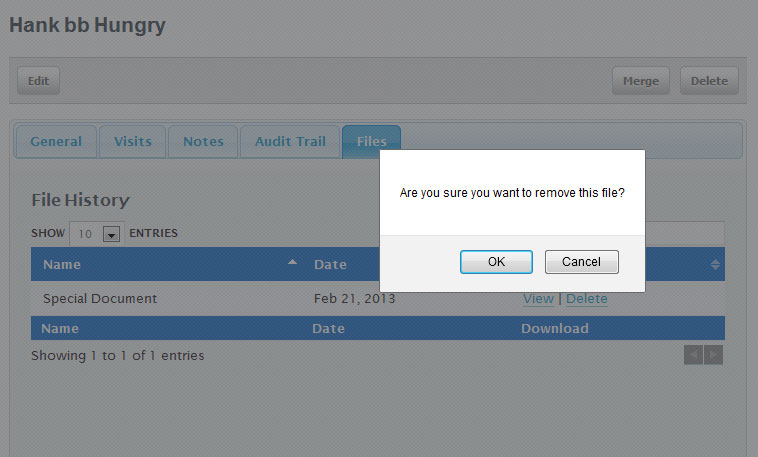
Ok I just clicked the "Delete" link. A window pops up asking me if I am sure about this Delete. Here is your chance to cancel if this was a mistake because if you say OK it will delete the file permanently. There is no going back once deleted.
back to top